How to Mirror Android Screen to Ubuntu(GNU/Linux) Desktop With Scrcpy
About Scrcpy
scrcpy is an application for displaying and controlling your Android device through USB connection (or over TCP/IP). It is cross-platform (GNU/Linux, macOS and Windows) and does not require any root access.
scrcpy displays only the device screen but offers great performance (30~60fps) and quality (1920×1080 or above). It’s got low latency (35~70ms) and a very low startup time (less than a second). It offers plenty of great features and is non-intrusive, with nothing left installed inside the device.
scrcpy works with Android devices with at least API 21 (Android 5.0) and adb debugging must be enabled on the device.
Scrcpy Features
Capture configuration - mirror Android device with reduced size, bit-rate, frame rate and cropped screen
Connection - wireless, multi-device or through SSH tunnel
Other mirroring options - read-only, turn screen off, show touches, etc.
Screen recording
Window configuration - change window title, position and size, border, etc.
Input control options
File drop
SetUp - Scrcpy
- Enble Universal Repository in your linux
- run terminal --> sudo add-apt-repository universe
- or goto software manager and enable above selections and refresh software cache
- community maintained free and open-source software(universe)
- software restricted by copyright or legal issues(multiverse)

- Install the scrcpy package
- run terminal --> sudo add install scrcpy
- Create scrcpy desktop shortcut
- create scrcpy desktop shortcut
- Scrcpy doesn't provide a desktop shortcut by the default, but it doesn't mean we can't create it. Copy and paste this format to text editor
[Desktop Entry] Name=Scrcpy Comment=Mirror Android Screen on Linux Exec=scrcpy Type=Application Icon=/path/to/your/custom/icon Categories=AudioVideo;Audio;Development; - Save as something.desktop on ~/.local/share/applications.
- For icon section, it's better to copy it into ~/.local/share/icons (just create it if the folder doesn't exist), so you don't have to write the full path


SetUp - USB
- Enable debugging developer options
- Settings > System > Developer Options > USB debugging
- Connect your phone to your computer via USB cable
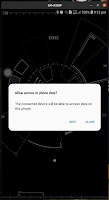
- Open scrcpy and Allow USB debugging in your phone
- run terminal --> scrcpy

- or tap scrcpy icon


SetUp - Wireless
- Enable debugging developer options
- Settings > System > Developer Options > USB debugging
- Enable Phone Visibility

- For First time Connect your phone to your computer via USB cable
- Connect the device to the same Wi-Fi as your computer.
- Get your device IP address, in Settings → About phone → Status, or by executing this command:
- adb shell ip route | awk '{print $9}'
- Enable adb over TCP/IP on your device
- adb tcpip 5555
- Unplug your device.
- Connect to your device
- adb connect DEVICE_IP:5555 (replace DEVICE_IP)
- Open scrcpy and Allow USB debugging in your phone
- run terminal --> scrcpy


Errors
- Not Enable debugging developer options or not Allow USB Access


- Connected multiple devices

- Not Connect the device to the same Wi-Fi as your computer or IP address are wrong


Scrcpy Shortcut Keys

(or you can download & install assistive touch into your phone)
For more :-


Comments
Post a Comment